Excuse the long title, but this drove me absolutely bonkers. Part of creating prototypes that are as realistic as possible is ensuring that you have as close to the actual resources as possible. I was building a Figma prototype the other day on a Windows desktop I have at home and it did take more effort than I liked to setup Apple’s UI fonts. Being an ex-Software Engineer I did find a way, and I hope to help other Designers who may not have the know-how.
Step 1: Download the fonts
Sounds easy enough– after a quick Google I quickly found myself on the official source of Apple’s San Francisco fonts for text and display:
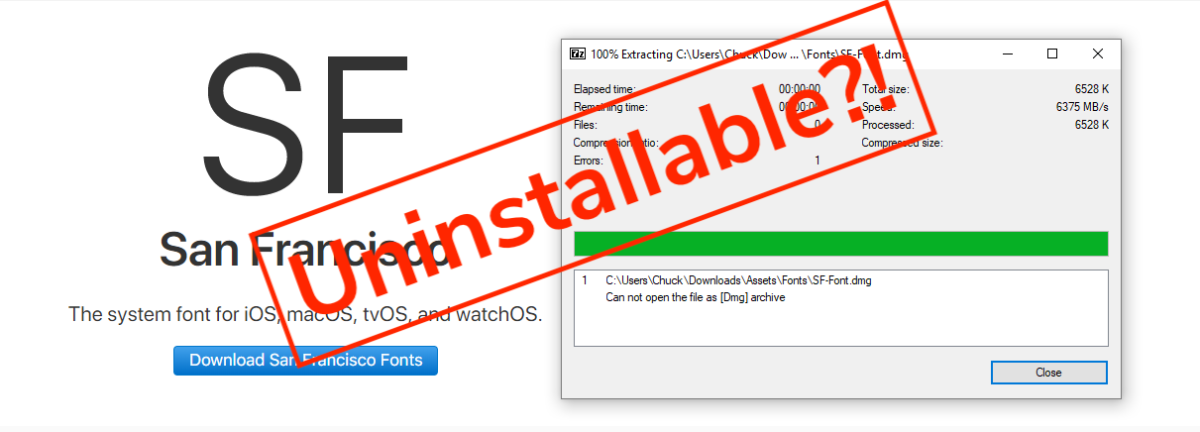
Problem is, the .dmg file is not a native format to Windows. Most Designers and Mac people will recognise this as a standard file format containing applications or plugins for applications. Think of it as a fancy .zip or .rar file.
I followed this guide and similar resources, but to no avail:
https://graphicdesign.stackexchange.com/questions/71470/how-to-use-san-francisco-font-on-windows
I wanted to install as little single-use software as possible, and had no luck extracting using the 7zip utility (refer back to the featured image at the beginning). After some more digging, I actually found and downloaded the fonts from here in a lovely .zip folder:
End of story right? Extract the folder and install the fonts? Nope! Windows 10 throws a fit at some .otf files.
Step 2: Convert your Fonts to Installable Formats
The easy mode is to use an online converter, but I find that online tools like that don’t make it easy to convert multiple files at a time. This is probably to prevent people overloading their systems with huge requests. If you only have one or two fonts, you can probably use one like this:
Ain’t as much fun though, is it? Let’s do the techie thing and convert them ourselves!
2a. Install the Windows subsystem for Linux on your machine:
https://www.windowscentral.com/how-install-bash-shell-command-line-windows-10
If you haven’t used it before and are a bit daunted by using terminals, don’t worry I’ll try to make it as clear as possible :wink:. Plus, it’s the Swiss Army Knife of computers. I hooked up my system with Ubuntu as I thought most guides online would be in that format.
2b. Open up a bash terminal once you’re ready. Windows key + “bash.exe” or within the start menu, find the program “bash.exe”.
I found and used this guide to help me:
http://www.stuermer.ch/blog/convert-otf-to-ttf-font-on-ubuntu.html
So, let’s install the fontforge cli (command line interface) tool:
# Just to make sure we have the latest repo info
sudo apt-get update

# Now install fontforge
sudo apt-get install fontforge -y

# Change directory to where you downloaded the fonts.
# Here's where I put mine
cd /mnt/c/Users/Chuck/Downloads/Assets/Fonts/
Since the file systems are quite different on a Windows machine versus a Linux machine, it’ll take a bit of getting used to and wrangling the two worlds to get to where you want to be. If you think of your Local C: drive, that’s just a hard drive device on the computer. Linux typically mounts those devices on the root system under /mnt, so the path above is saying /folder where Linux mounts hard drive and USB drives/the C drive/usual folders....
Back on Windows land, copy paste the script to a new file where you downloaded your fonts and call it otf2ttf.sh. Notepad application is just fine. You could call it anything really, but if you’re charting really unfamiliar territory it’s best to leave the names as is:
#!/usr/local/bin/fontforge
# Quick and dirty hack: converts a font to truetype (.ttf)
Print("Opening "+$1);
Open($1);
Print("Saving "+$1:r+".ttf");
Generate($1:r+".ttf");
Quit(0);
Done? Cool. Make sure it’s executable over in bash land.
# Make that new script file executable
chmod +x otf2ttf.sh

# Lost? Make sure you're in the right directory! Check using pwd command:
charlesr@DESKTOP$ pwd
/mnt/c/Users/Chuck/Downloads/Assets/Fonts
Sweet, now we can do our conversions!
# Test out a single file to make sure it works as expected:
fontforge -script otf2ttf.sh ./SF-Fonts-June19/SF-UI/SF-UI-Display-Black.otf

# Worked? Great! Let's convert them all up
for i in ./SF-Fonts-June19/SF-UI/*.otf; do fontforge -script otf2ttf.sh $i; done
Step 3: Install the Fonts
All that’s left is to install all the fonts! To make this easier, let’s put all the .ttf files in a folder:
# Move to the fonts folder
cd SF-Fonts-June19/SF-UI

# Make a new folder for the ttf
mkdir converted-fonts

# Now move all .ttf files to the new folder
mv *.ttf converted-fonts

# Prove they're there
ls converted-fonts
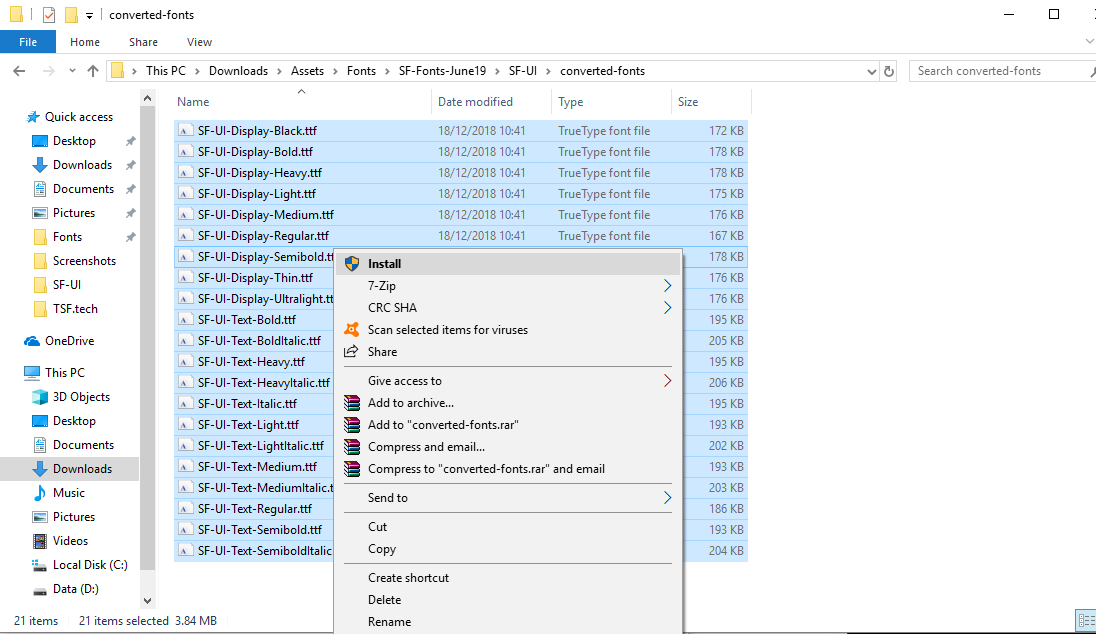
Highlight all the new .ttf fonts in Windows explorer, right click and install:
Well done; go forth and let your prototyping skills shine!
If you get stuck or want to chat, you can find me on Twitter via @chuckwired or email.